
Printing a photo on a fabric is one of the simpler ideas to create a unique pattern on a fabric or knitwear. So, to have an effective and personalized material, you do not even need to have artistic skills. However, in order for the photography to create an intriguing and aesthetic pattern, you need to work a little with the camera and the graphics program. Gggggmyimg0
Picture on fabric – which one should I use?
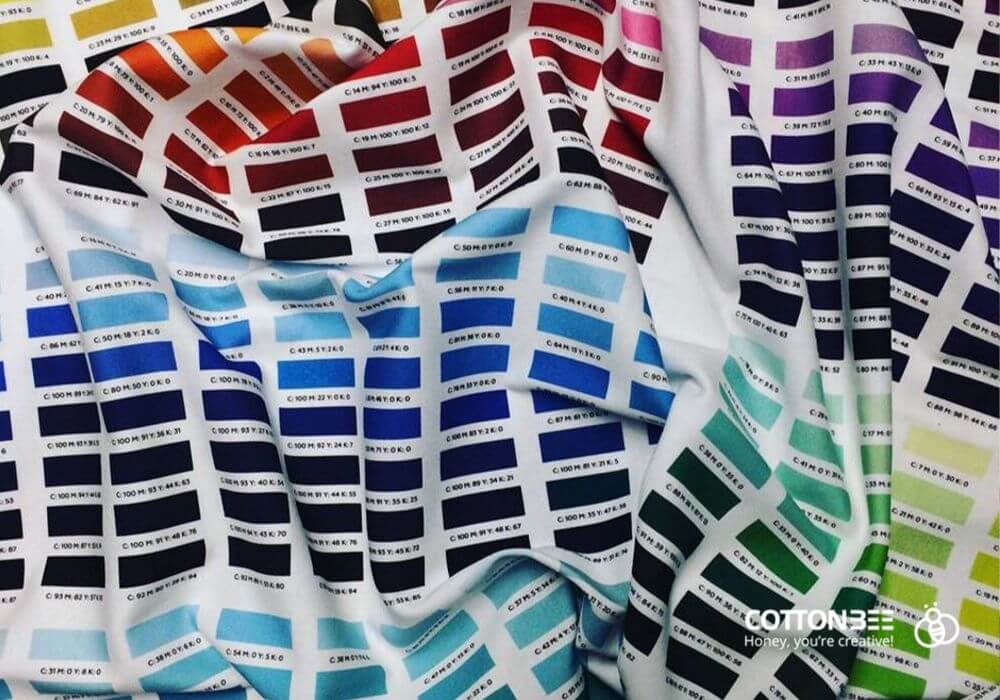
At the very beginning, technical issues. The photo must be in good resolution. We are talking about a minimum 150 dpi . The maximum weight cannot exceed 25 MB , and the size cannot exceed 10,000 x 10,000 px . The image is best saved in TIFF format recognized by a wide range of graphic programs, although it can also be sent in the form of JPG or PNG. The colors of the photo should be saved in the palette CMYK using the CMYK color profile: U.S. Web Coated (SWOP) v2.
Also check: How to properly prepare a file for fabric printing?
Large format for printing
Suppose you do not have the photo you want to print on your camera’s memory card yet. This can be an advantage as it will be easier for you to decide what you want to photograph with keeping in mind the intended use of the photo. There are two possibilities: you can print one photo along the entire length of the fabric or repeat it on a fabric or knit fabric many times in the form of a seamless pattern.
If you don’t feel strong enough to modify the photo in Photoshop, you can print it along the entire length of the fabric as one report, i.e. the smallest element of the pattern that is reproduced on the material . Here, however, you should remember to prepare the file with its target size in mind. In this case, get ready for a little math revision. For example, if a photo is to be printed on cretonne with a maximum print width of 147 cm , this length should be divided by 2.54 cm (1 inch in metric), then multiply by 150 (pixels per inch). This way you get the file resolution needed to print it over the entire length of the beam without repeating the pattern.
Pattern straight from the camera
The second option to use a photo for printing on a fabric is to create a seamless pattern in which elements from the photo will blend seamlessly with each other, without much or no manipulation of the image. In this case, geometric forms that fill the entire frame from edge to edge and from top to bottom will work. A brick wall, terraced houses, windows creating a rhythm on the facade of the building, tiles on the floor or blocks – these will be the models of your dreams. Below you will find inspiration to create geometric patterns for printing from photos.

In a situation where you want more organic forms, you must remember that some image manipulation will be necessary here. From a photo of a blue sky with clouds or a frame full of flowers, you can confidently create a seamless pattern by selecting individual elements and moving them beyond the boundaries of the photo.
Also check: How to properly prepare a seamless pattern for fabric printing?
Collage = print
Of course, the possibilities of printing photos on fabric do not end there. A photo on the fabric can become a component of a larger pattern, which will later be made into graphic tees. A collage of photos from a family event or an important event will allow you to create a pattern on the fabric, from which commemorative sweatshirts will be made. You can create giant patches from your photos and sew them on the back of your denim jacket – the only limit is your creativity.
Also check: How to print a pattern on a fabric or knit?
Theory in practice
It is worth spending a few minutes to read the Upload file subpage in the CottonBee fabric printing house.
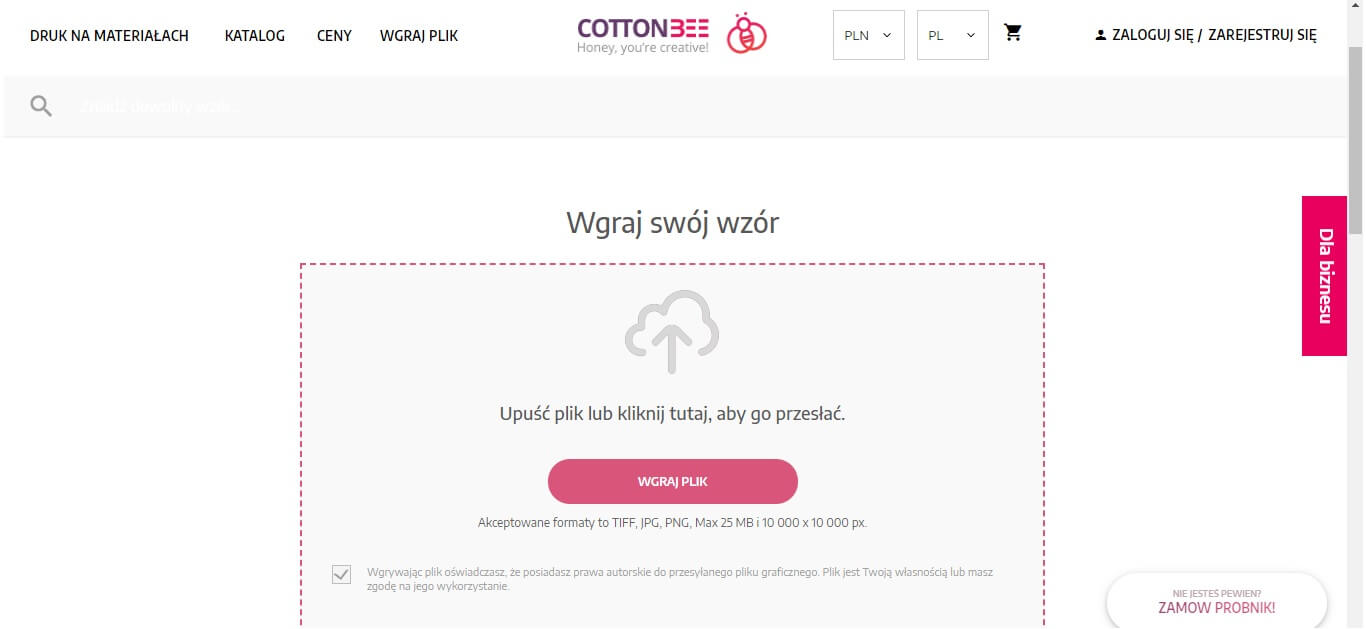
You just need to upload any photo that will become a report and play with different ways of repeating the pattern. So let’s upload your photo to the tool and check what it will look like when printed as one report.
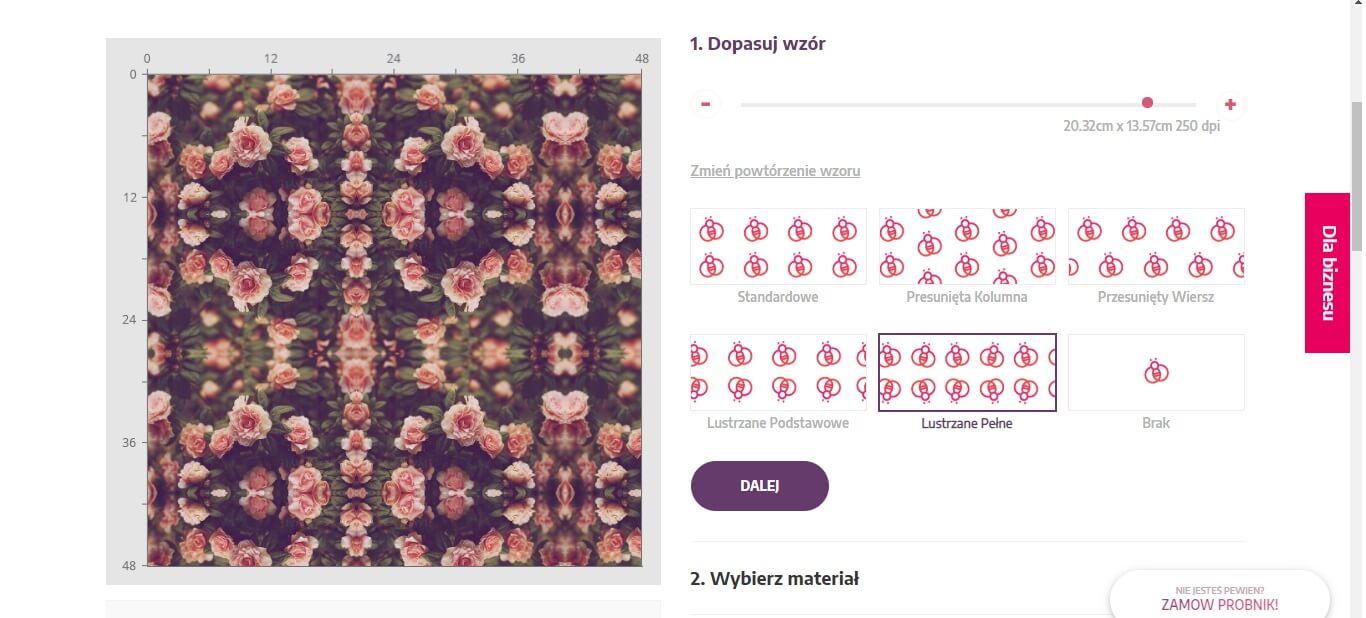
The example shows clearly that the resolution of the file is too small, so we will adjust the size of the pattern and use the standard method of repeating the report.
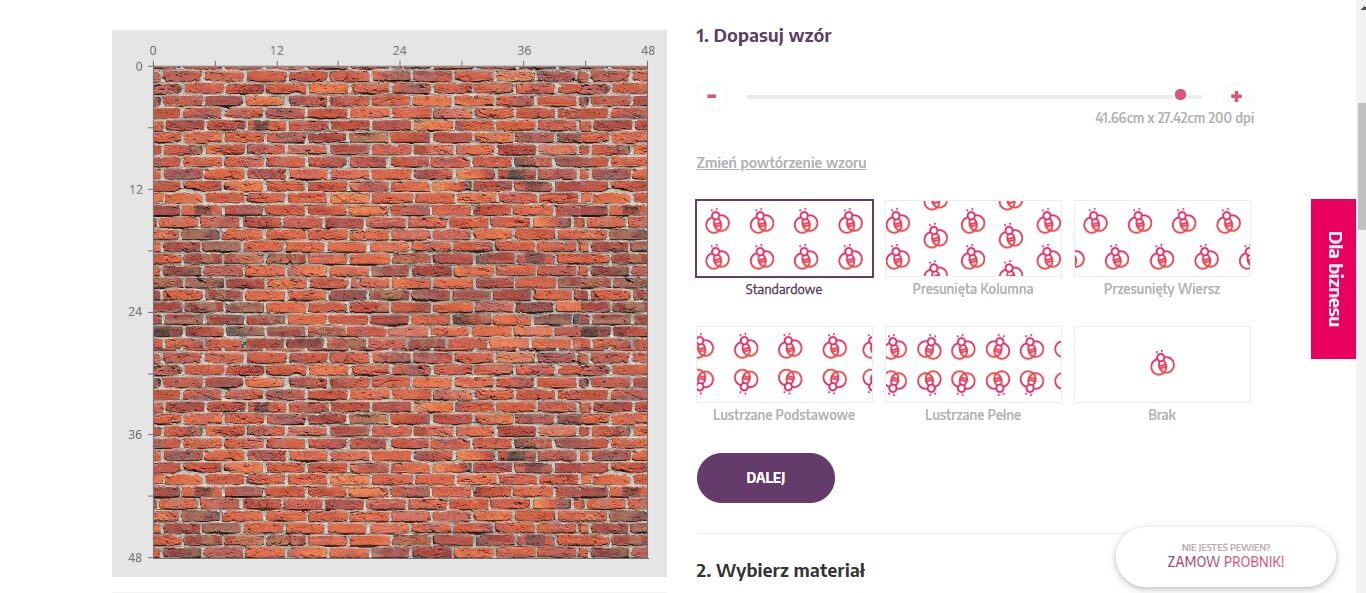
Geometric patterns in photos without any processing in the graphics program are suitable for creating a seamless pattern. But suppose the brick material is not the height of your dreams and you’d rather print something else, such as flowers.
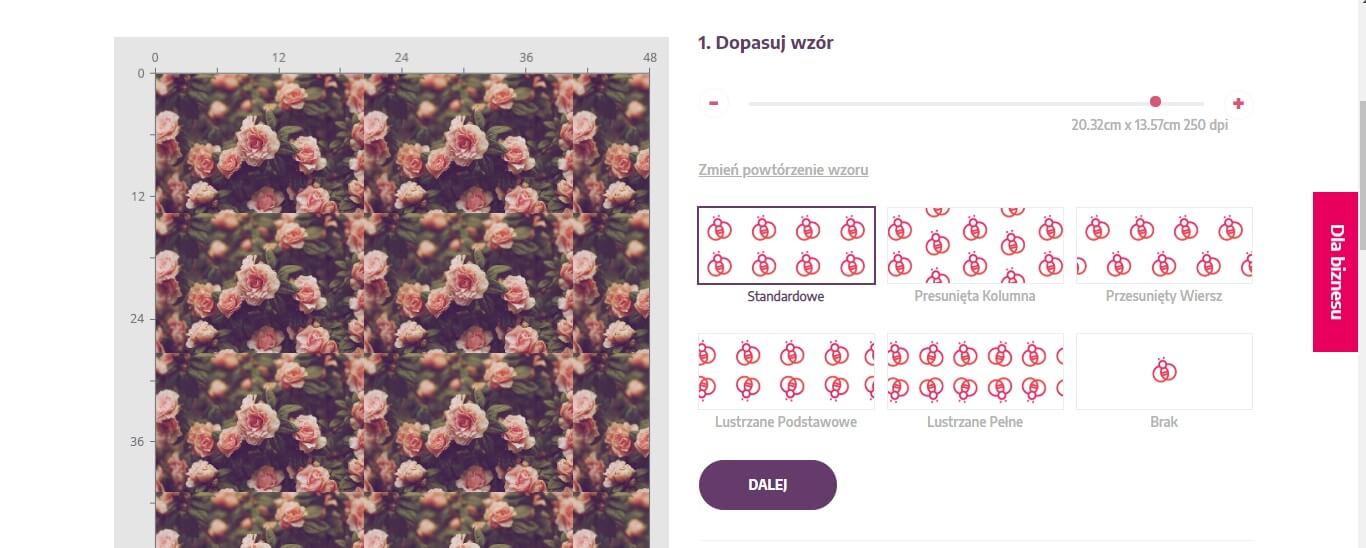
With the standard repetition in this case, the lines where the pictures are joined are clearly visible. Just change the repetition to full mirror to get an intriguing pattern from the photo.
The possibilities of printing photos on material, of course, do not end there. As long as the photo meets the technical requirements, you can print anything.
What method should I choose to print my photo?
Whether you want to print a photo of a flower meadow or a 30th wedding anniversary cake – choosing the right printing method is the key to your satisfaction with the end result. When printing photographs, where the most accurate color reproduction is crucial, digital printing is the best solution. In this form of printing, there are two types to choose from – reactive and pigment printing .
Reactive printing is a more durable method of dyeing fabrics, as chemical dyes react with the fibers of the fabric into which they penetrate. Reactive printing ensures very good color saturation. However, if you do not plan to order a minimum of a beam of material with a photo of your cat in the bathtub, reactive printing will not be the right solution.
In pigment printing the dye remains on the top layer of the fabric, not penetrating its interior. Cotton printed with pigment and properly treated (washing in a washing machine on a delicate program, with an agent containing no strong detergents or only chemically, without the use of water) allows you to enjoy a beautiful pattern for a long time. Pigment printing has the advantage over reactive printing that it allows for short lead times and allows you to place small orders, which in the case of other printing methods are unprofitable. Pigment printing does not use water or chemicals, so it is high on the list in terms of environmental performance.

When printing photos on the fabric on the back of the head, you have to remember that the colors you see on the monitor may differ slightly from those applied to the fabric or knitwear. The ability to purchase a trial print with dimensions of 20 cm x 20 cm or a coupon of material with dimensions of 48 cm x 48 cm will save you disappointment with the final result and will not ruin your budget as an order of 5 linear meters of fabric that you don’t end up using for anything.
More information about specific printing methods can be found in our post on printing on materials.
When choosing a photo and a printing method, it is worth taking into account the desired end result. A little planning can never hurt, even in the creative process. Any questions regarding printing photos on material can be sent to [email protected] .
